Excerpt

Showing posts with label windows. Show all posts

Thursday, November 10, 2016

Move files into folders, sorted by month and day with PowerShell

Notes:


  • Not suitable for folder with sub-folders, such as folder of extracted zip file

  • Recommended to execute on a test environment first


Steps:


  1. Change the $files and $targetPath values accordingly

  2. Copy the modified script and paste into Windows PowerShell

  3. Wait


The script:


# Get the files which should be moved, without folders
$files = Get-ChildItem 'CHANGE THIS TO ORIGINAL PATH' -Recurse | where {!$_.PsIsContainer}

# List Files which will be moved
$files

# Target folder where files should be moved to. The script will automatically create a folder for the year and month.
$targetPath = 'CHANGE THIS TO TARGET PATH'

foreach ($file in $files)
{
# Get year and Month of the file
# I used LastWriteTime since this are synced files and the creation day will be the date when it was synced
$year = $file.LastWriteTime.Year.ToString()
$month = $file.LastWriteTime.Month.ToString()

# Out FileName, year and month
$file.Name
$year
$month

# Set Directory Path
$Directory = $targetPath + "\" + $year + "\" + $month
# Create directory if it doesn't exsist
if (!(Test-Path $Directory))
{
New-Item $directory -type directory
}

# Move File to new location
$file | Move-Item -Destination $Directory
}

Screenshots:


[caption id="attachment_5100" align="aligncenter" width="646"]2016-11-09_11-51-24 Before (what a mess!)[/caption]

2016-11-09_11-58-42

2016-11-09_12-10-37

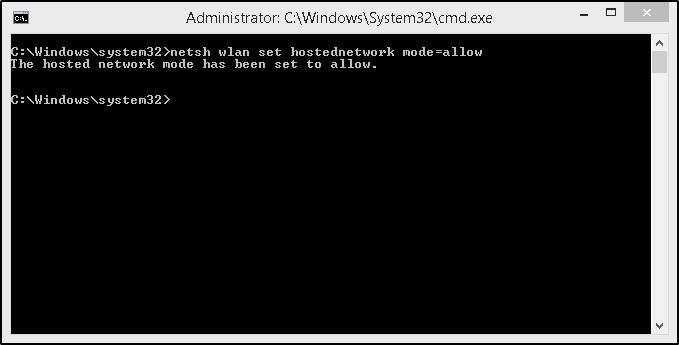
[caption id="attachment_5104" align="aligncenter" width="702"]2016-11-09_15-14-41 After[/caption]

2016-11-09_12-16-26

Source:


http://www.thomasmaurer.ch/2015/03/move-files-to-folder-sorted-by-year-and-month-with-powershell/

Sunday, April 3, 2016

Clipboard Manager? Ditto jadikan Copy Paste lebih mudah

Ditto Clipboard Manager, adalah satu aplikasi (free & open source) yang sangat bagus untuk pengguna OS Windows. Ianya memudahkan pengguna untuk manage atau menggunakan semula items yang disalin (copy) untuk digunakan (paste) semula, pada bila-bila masa. Ini kerana semua items (bergantung pada setting) yang disalin akan disimpan di dalam database.

Sebagai contoh, kita copy satu ayat atau paragraph dari satu website. Kemudian, pada esok hari atau bila-bila sahaja ianya boleh digunakan semula (paste). Tambahan pula, ianya lengkap dengan fungsi carian yang memudahkan lagi kita untuk mencari perkataan atau items yang kita salin.

Atau, mungkin kita ada salin banyak URL website, kalau tanpa Ditto setiap URL yang kita salin akan dihapuskan dengan items baru yang kita copy. Memang di browser kita ada bookmark, tapi haruskah kita buka browser setiap kali? Sedangkan kita nak paste bukan di browser?

Ishhh... macam susah nak explain... bacalah sendiri dia punya description ni hahaha!
Ditto is an extension to the standard windows clipboard. It saves each item placed on the clipboard allowing you access to any of those items at a later time. Ditto allows you to save any type of information that can be put on the clipboard, text, images, html, custom formats, .....

Some Features of Ditto Clipboard Manager


  • Easy to use interface

  • Search and paste previous copy entries

  • Keep multiple computer's clipboards in sync

  • Data is encrypted when sent over the network

  • Accessed from tray icon or global hot key

  • Select entry by double click, enter key or drag drop

  • Paste into any window that excepts standard copy/paste entries

  • Display thumbnail of copied images in list

  • Full Unicode support(display foreign characters)

  • UTF-8 support for language files(create language files in any language)

  • Uses sqlite database (www.sqlite.org)


Anyway, Abah dah menggunakan tool ni agak lama. Compatible dengan Windows 7 — Windows 10. Walaupon terdapat banyak clipboard manager di internet, bagi Abah, Ditto Clipboard Manager adalah yang terbaek!

Boleh download Ditto di website ni: http://ditto-cp.sourceforge.net/

Tuesday, February 23, 2016

F5 Networks Error: Network Access Connection Device not found

F5 Networks Error: Network Access Connection Device not found

OS: Windows 8 and higher

Browser: Firefox

Solution: Manually install the network driver

How To:

  1. Download this F5driver

  2. Open the Device Manager

  3. Look for F5 related device with error icon (exclamation mark)

  4. Right click on it, choose Update Driver Software

  5. Use the Have Disk option, choose "covpn2~1.inf" file from the saved F5driver folder


Side Notes:

  1. If the F5 plugin installation failed in Firefox, set the "xpinstall.signatures.required" value to "false" (in about:config)

Friday, August 7, 2015

Linking (faking) a folder into OneDrive

In my case, I have a folder ("2015" in Pictures) which in a different partition. Installed OneDrive app, and I don't want to "move" the "2015" folder into "OneDrive\Pictures" as it will increase my C:\ drive usage.

So, here is how I did, basically it's like "faking" a folder in "OneDrive\Pictures"
Syntax: mklink [[/d] | [/h] | [/j]] <Link> <Target>

Example:

Link — "C:\Users\Hilman\OneDrive\Pictures\2015-link"

Target — "D:\Pictures\2015"


  1. Run a CMD as Administrator

  2. Type "mklink /j "C:\Users\Hilman\OneDrive\Pictures\2015-link" "D:\Pictures\2015"

  3. A folder (fake) with name "2015-link" will be created in "C:\Users\Hilman\OneDrive\Pictures", thus will be sync into OneDrive online — You may notice the folder will look like a shortcut icon


What happen then? Well, whenever I saved a photo into "2015-link" folder it will actually save it into "D:\Pictures\2015"... and vise versa. Of course, it will not increase my C:\ drive usage.

For more info about MKLINK parameters, click this.

Note(s):

  1. Do not create the folder in Link, instead create it in CMD prompt. Otherwise, an error will appears saying "Cannot create a file when that file already exists."

Monday, June 8, 2015

Jadikan Laptop sebagai Wifi Hotspot

Sekadar nota kaki untuk sendiri dan kepada sesiapa yang berminat nak mencuba.

Cara ni sama je dengan cara-cara yang boleh didapati di Google, in fact ada banyak tools/apps yang boleh digunakan untuk tujuan yang sama. Mungkin berbeza sikit tutorial ni sebab menggunakan bahasa pasar. Anyway, sangat bagus sekiranya wifi yang sedia ada berada jauh (signal yang lemah). Seeloknya, laptop tu menggunakan LAN cable untuk network connection dan semestinya LAN mempunya akses internet.

Tanpa membuang masa, kalau nak create Wifi Hotspot guna laptop (secara manual) jom kita mulakan...

1) Taip (kalau malas taip, copy paste je) ke dalam Notepad. Optionally, boleh tambah command "pause" di line terakhir (untuk troubleshoot, in case kalau ada error). "key" tu tukar ikut citarasa, sebagai password.
netsh wlan stop hostednetwork
netsh wlan set hostednetwork mode=allow ssid=WifiAku key=abcd1234
netsh wlan start hostednetwork
pause

2) Save notepad tadi kepada "Hotspot.bat" ke Desktop. Masa nak save tu pilih "Save as type" kepada "All Files (*.*)"

3) Click kanan pada Hotspot.bat tadi (di Desktop) dan pilih "Run as administrator". Kalau ada prompt security warning, click pada "Yes"

4) Pergi ke Control Panel dan click pada "Network and Sharing Center".  Click pada "Connections: Ethernet", pilih "Properties" > tab "Sharing" > pilih "Allow other network users..." > pilih nama network yang baru untuk SSID WifiAku tadi (contoh: Local Area Connection***)

5) Click OK

Dah siap semua steps di atas, gunakan phone pulak untuk cari Wifi Hotspot tadi. Gunakan "key" sebagai password. Anda akan mendapat signal yang kuat sebab wifi hotspot tu berada di depan mata anda :-)

https://www.youtube.com/watch?v=0aWSaMsQs2g

P/S:

- Encryption yang digunakan dalam tutorial ini adalah "WEP". Untuk advanced features, sila gunakan tools/apps yang sesuai atau cari tutorial yang lain di Google

- OS yang digunakan dalam tutorial ni adalah Windows 8.1, boleh diguna pakai untuk OS lain seperti Windows 7. Selain tu, tak pasti hehehe

Friday, January 16, 2015

Virtual Router Manager - State error

An error appears while starting the virtual router manager
The group or resource is not in the correct state to perform the requested operation


Solution:

1) Open Command Prompt window (as Administrator if possible)
2) Type: netsh wlan set hostednetwork mode=allow
3) Enter


Virtual Router Manager should work now! :-)

Sunday, May 11, 2014

Thanks MiniTool Partition Recovery!!!

This tool really helped me! The tool ability is so powerful as it able to recover my lost files in deleted partition due to FULL SYSTEM RECOVERY by DELL. Yeah, thanks to Dell Datasafe Local Backup for wiping my partitions to the factory state even I didn't choose to and even you said it only will affect C:\ partition!!! And thanks for creating a new blank partition named ALCHEMY for me too. I should have record the recovery process LOL!

Anyway, here is the link for MiniTool Partition Recovery:

http://www.minitool.ca/

http://www.powerdatarecovery.com/power-data-recovery.html

http://www.powerdatarecovery.com/power-data-recovery-compare-license-type.html

It not only helps you recover deleted files, but also recovers data from damaged, reformatted hard drive as well. Furthermore, MiniTool Power Data Recovery not only recovers data from hard disk and RAID device, but also supports to recover data from CD, DVD disks, memory card, memory stick, and flash drive.

As a data recovery software suite, MiniTool Power Data Recovery includes five data recovery modules - Undelete RecoveryDamaged Partition RecoveryLost Partition RecoveryDigital Media Recovery and CD/DVD Recovery. Each data recovery module focuses on different data loss condition.

And we provide Power Data Recovery Boot Disk for you. With our Data Recovery Boot Disk, you could recover data after system crash, hard drive crash and booting problems without Operating System.

Supported Windows Operating Systems:


* You need to register your copy of MiniTool Power Data Recovery with a commercial license.

Data Recovery Abilities:


  • Recover deleted files and folders

  • Recover data from damaged partition

  • Recover data from inaccessible hard drive

  • Recover data after re-partition

  • Recover data from a crashed hard drive

  • Recover data after an MBR corruption

  • Recover data after reinstalling windows

  • Recover data from formatted partition with original path and filename

  • Recover photos from memory card

  • Recover music and video from iPod

  • Recover data from quick formatted CD/DVD disk

  • Recover data from an unfinalized DVD disk

  • Recover files from scratched or defective CD and DVD disk

  • Recover data from Windows Dynamic Disk Volume


(Spanned Volume, Striped Volume, Mirrored Volume and RAID5 Volume)

License


MiniTool Power Data Recovery Free Edition is for private, noncommercial, home computer use only. Use of MiniTool Power Data Recovery Free Edition within any organization or for commercial purpose is strictly prohibited. 

To use Power Data Recovery in commercial environment, you need to purchase a commercial license.