Excerpt

Showing posts with label Tutorial. Show all posts

Tuesday, February 14, 2017

Aplikasi Android yang mesti aku install (mungkin anda juga)

Setiap pengguna telefon (Android / IOS) pasti akan install aplikasi yang dirasakan perlu. Samada untuk kerja, sosial, permainan dan lain-lain.

Sebelum kita install sesuatu aplikasi, perlulah kita fikir pro & cons aplikasi tersebut, harga, saiz, permission, penggunaan data dan lain-lain. Dan untuk itu, berikut adalah sedikit perkongsian tentang aplikasi yang mesti ada di setiap telefon aku.

  1. Al-Quran (Tafsir & by Word)

    • Banyak aplikasi Al-Quran yang pernah aku gunakan sebelum ini, termasuk yang berbayar. Cuma kebelakangan ini, aku lebih kerap gunakan yang ini dan telah pon remove yang lain.

    • Percuma, tiada ads, font yang boleh diubah saiz, tajwid berwarna, terjemahan ayat atau perkataan, lebih banyak pilihan audio dan lain-lain.


  2. Automatic Call Recorder

    • Adalah amat penting untuk kita merakamkan segala perbualan sebagai rujukan dan bukti jika diperlukan. Sebagai contoh, kita dapat jadikan rakaman perbualan dalam pembelian jual-beli secara online/telefon sebagai bukti sekiranya terdapat penipuan. Dalam situasi lain, kita boleh mendengar semula rakaman perbualan sekiranya tidak jelas atau lupa apa yang dibualkan.

    • Percuma dengan ads (terdapat versi Pro), rakaman yang jelas, cloud backup dan lain-lain.


  3. Chrome Browser

    • Sekiranya kita melayari internet dari banyak device (PC, phone, tablet), pasti lebih mudah sekiranya semua bookmarks/password/history dapat digunakan semula di setiap device. Untuk itu, Chrome mempunya fungsi synchronize yang baik dan selamat.

    • Percuma, tiada ads, by Google.


  4. ColorNote

    • Satu aplikasi yang kecil tetapi bagus untuk nota-nota ringkas dan checklist.

    • Percuma, tiada ads, internal & cloud backup, sync multiple devices, reminder.


  5. ES File Explorer Pro

    • Setiap telefon pasti ada pre-installed file manager, tetapi fungsinya adalah terhad. Aplikasi ini amat berguna kepada intermediate / advance user.

    • Cloud management, network browse, FTP mode, SD card analyst, root explorer dan lain-lain.


  6. Flickr

    • Photo hosting yang menawarkan saiz simpanan yang besar (1TB) dan percuma. Selain itu, aplikasi ini juga mempunya fungsi auto sync/backup setiap gambar yang kita snap.


  7. Google Drive

    • Aplikasi yang membolehkan kita akses fail-fail dan gambar yang disimpan di Google Drive. Contohnya, dokumen (word, excel, PDF, etc) yang diupload dari PC.


  8. Google Maps

    • Sangat berguna bagi orang yang selalu sesat atau tak tahu jalan, seperti aku.

    • By Google, data usage friendly, offline maps.


  9. Nova Launcher Prime

    • Bosan dengan interface standard? Aplikasi ini membolehkan kita customize interface di banyak sudut.

    • Banyak customization (home, app drawer, folder, icon, etc), ringan dan pantas.


  10. Quick Profiles

    • Mempercepat dan memudahkan pertukaran volume, wifi dan lain-lain mengikut profile yang direka.

    • Percuma, tiada ads, mudah digunakan.


  11. SideSync

    • Aplikasi daripada Samsung untuk mengawal (remote) dan akses fail di dalam telefon menggunakan PC.

    • Percuma, no ads, wireless and cable remote. Tapi hanya untuk telefon Samsung.


  12. Snapseed

    • The best photo editing app so far (to me).

    • Percuma, no ads, by Google, lots of RAW file editing.


  13. Waktu Solat Malaysia

    • Terkenal di Malaysia kerana buatan rakyat Malaysia.

    • Percuma, no ads, reminder, kompas, themes, plugins dan lain-lain.


  14. QRMaster

    • Aplikasi yang terpaksa install, sebab kalau tak install tak boleh masuk office :-D


Well, that's about it (ada beberapa lagi, tapi dah letih menaip haha). Apa-apa pon, artikel ni hanya sekadar berkongsi pendapat sendiri dan mungkin bukan yang terbaik.

Last but not least;

  • Cuba elakkan install aplikasi yang terdapat ads (iklan) dan cuba beli PRO version jika mampu (banyak yang murah).

  • Lihat ranking, rating, baca review.

  • Fahamkan permission yang akan digunakan oleh aplikasi tersebut.

  • Lihat tahap aktif, bila latest update.

  • etc.


Adios!

Monday, January 30, 2017

Flashtool 0.6.9.1 (Windows)

Yep, I know... it's old. But still useful for someone (like me).

Download Flashtool 0.6.9.1 (Windows)

Latest version? Go to http://www.flashtool.net/

What is Flashtool?
FlashTool is one of the most powerful tools for Sony Xperia devices and has been around since the Xperia X10 days. The utility has been updated to version number 0.9.18.1, which brings a very useful new feature – the ability to download the latest firmware files for your Sony Xperia device.

Once you have downloaded the latest version, simply head over to the Update Checker part of the tool to select and download your firmware. In theory, this negates the need to use two tools (XperiFirm and FlashTool) to create a FTF firmware file as detailed in our recent guide. — http://www.xperiablog.net/

Friday, January 13, 2017

Disable or deactivate Device Security (Smart Manager)

Device: S7 Edge (SM-G930FD)

Android version: 6.0.1 Marshmallow

Scenario: Accidentally activated the Device Security and not able to deactivate anywhere in Smart Manager app.

Instructions to deactivate:

  1. Open the app drawer and select Settings --> Applications --> Application manager

  2. Click MORE menu on right top --> Show system apps

  3. Search for "COM.SAMSUNG.ANDROID.SM.DEVICESECURITY" and tap

  4. Tap the "CLEAR CACHE" following by "CLEAR DATA" (confirm the DELETE if warning prompted)

Thursday, November 10, 2016

Move files into folders, sorted by month and day with PowerShell

Notes:


  • Not suitable for folder with sub-folders, such as folder of extracted zip file

  • Recommended to execute on a test environment first


Steps:


  1. Change the $files and $targetPath values accordingly

  2. Copy the modified script and paste into Windows PowerShell

  3. Wait


The script:


# Get the files which should be moved, without folders
$files = Get-ChildItem 'CHANGE THIS TO ORIGINAL PATH' -Recurse | where {!$_.PsIsContainer}

# List Files which will be moved
$files

# Target folder where files should be moved to. The script will automatically create a folder for the year and month.
$targetPath = 'CHANGE THIS TO TARGET PATH'

foreach ($file in $files)
{
# Get year and Month of the file
# I used LastWriteTime since this are synced files and the creation day will be the date when it was synced
$year = $file.LastWriteTime.Year.ToString()
$month = $file.LastWriteTime.Month.ToString()

# Out FileName, year and month
$file.Name
$year
$month

# Set Directory Path
$Directory = $targetPath + "\" + $year + "\" + $month
# Create directory if it doesn't exsist
if (!(Test-Path $Directory))
{
New-Item $directory -type directory
}

# Move File to new location
$file | Move-Item -Destination $Directory
}

Screenshots:


[caption id="attachment_5100" align="aligncenter" width="646"]2016-11-09_11-51-24 
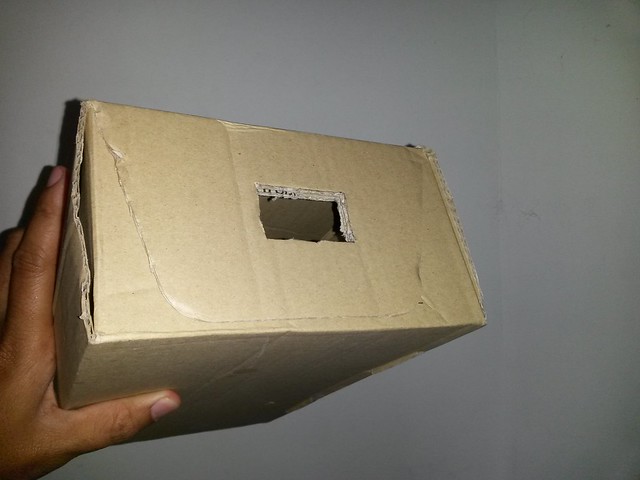
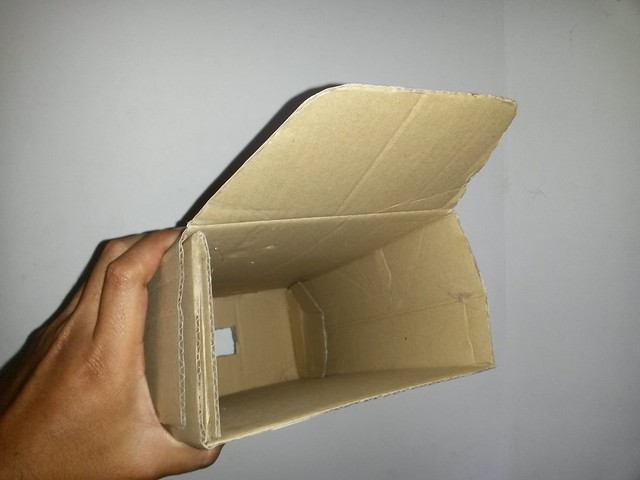
Before (what a mess!)[/caption]
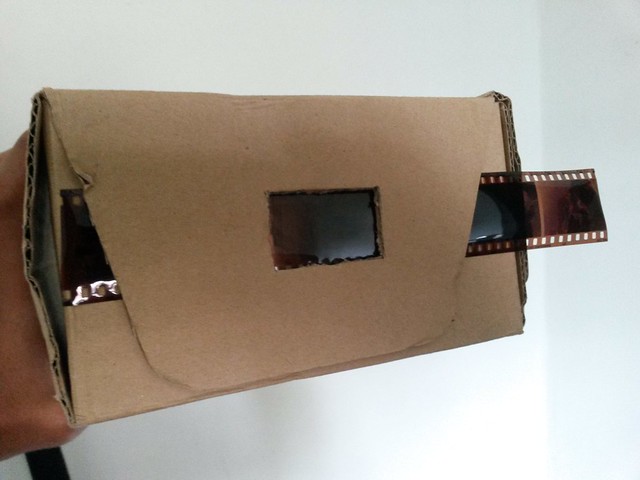
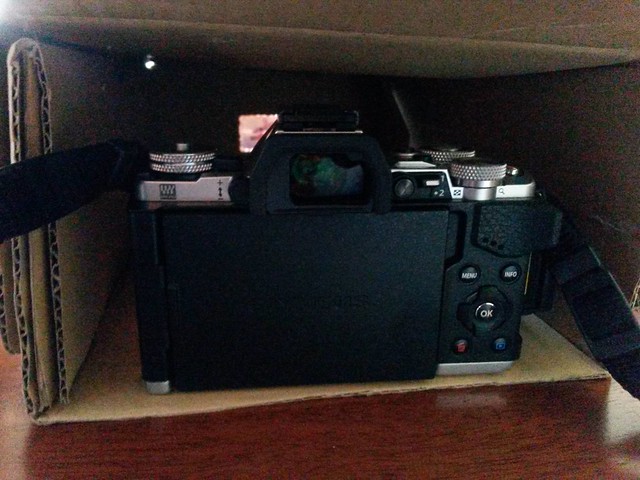
2016-11-09_11-58-42

2016-11-09_12-10-37

[caption id="attachment_5104" align="aligncenter" width="702"]2016-11-09_15-14-41 After[/caption]

2016-11-09_12-16-26

Source:


http://www.thomasmaurer.ch/2015/03/move-files-to-folder-sorted-by-year-and-month-with-powershell/

Tuesday, November 8, 2016

Hide Wordpress header image on specific URL

Objective: Hide Wordpress header image on specific URL


Target URL: All URL except http://hilmanali.com/blog/


Theme: Sorbet (child)


File name: header.php


Original code:


<body <?php body_class(); ?>>
<div id="page" class="hfeed site">
<?php do_action( 'before' ); ?>
<header id="masthead" class="site-header" role="banner">
<?php if ( get_header_image() ) : ?>
<a href="<?php echo esc_url( home_url( '/blog' ) ); ?>" rel="home">
<img src="<?php header_image(); ?>" width="<?php echo get_custom_header()->width; ?>" height="<?php echo get_custom_header()->height; ?>" alt="">
</a>
<?php endif; // End header image check. ?>
<div class="site-header-wrapper">
<div class="site-branding">
<h1 class="site-title"><a href="<?php echo esc_url( home_url( '/blog' ) ); ?>" rel="home"><?php bloginfo( 'name' ); ?></a></h1>
<h2 class="site-description"><?php bloginfo( 'description' ); ?></h2>
</div>

Modified code:


<body <?php body_class(); ?>>
<?php
global $wp;
$current_url = add_query_arg( $wp->query_string, '', home_url( $wp->request ) );
$is_specific_network = stripos( $current_url, 'http://hilmanali.com/blog/page/' );
?>
<div id="page" class="hfeed site">
<?php do_action( 'before' ); ?>
<header id="masthead" class="site-header" role="banner">
<?php if( $is_specific_network !== false ) { ?>
<?php } else { ?>
<a href="<?php echo esc_url( home_url( '/blog' ) ); ?>" rel="home">
<img src="<?php header_image(); ?>" width="<?php echo get_custom_header()->width; ?>" height="<?php echo get_custom_header()->height; ?>" alt="">
</a>
<?php } ?>
<div class="site-header-wrapper">
<div class="site-branding">
<h1 class="site-title"><a href="<?php echo esc_url( home_url( '/blog' ) ); ?>" rel="home"><?php bloginfo( 'name' ); ?></a></h1>
<h2 class="site-description"><?php bloginfo( 'description' ); ?></h2>
</div>

Screenshots:


2016-11-07_22_48_26

2016-11-07_22_49_05

2016-11-07_22_49_17


Thursday, October 6, 2016

HyppTV Everywhere WebTV Plug-in

Sekiranya anda mengalami masalah untuk download atau install HyppTV Everywhere WebTV Plug-in, boleh cuba langkah-langkah ini.

Objektif Utama:


  • Untuk menonton rancangan TV di internet browser (Firefox / IE / Chrome) menggunakan khidmat HyppTV Everywhere


Keperluan:


  • Pengguna Unifi

  • Berdaftar di HyppTV Everywhere

  • Menurut penjelasan dari he.help@tm.com.my, plug-in ini tidak boleh digunakan di internet browser Chrome


Masalah:


  • Login di http://hypptv.tm.com.my

  • Disuruh install HyppTV plug-in dengan klik butang OK

  • Tidak boleh download atau install HyppTV plug-in setelah klik butang OK (seperti gambar di bawah)


hypptv everywhere install failed

Solusi:


  1. Download WebTV Plug-in di sini (URL telah diberi oleh he.help@tm.com.my)

  2. Install plug-in tadi (boleh ikuti langkah di User Guide ini bermula 4b. iv)

  3. Setelah selesai, login semula di http://hypptv.tm.com.my

  4. Berkemungkinan, symptom sama akan berlaku jika klik butang OK. Teruskan dengan klik butang Cancel.


P/s:

  • Post ini ditulis setelah kecewa dengan jawapan-jawapan yang diberi di Twitter TMConnects dan direct message

  • Menulis tutorial dalam Bahasa Melayu memang sukar :-D

Friday, October 9, 2015

Kecilkan saiz gambar dengan JPEGmini

Terlalu banyak gambar dalam PC atau phone sehingga kehabisan disk space atau memory card? Jom kecilkan saiz gambar-gambar dengan JPEGmini!

Secara ringkasnya, JPEGmini adalah satu tool atau software yang mampu mengecilkan saiz gambar-gambar yang kita mahu tanpa menjejaskan kualiti gambar. Boleh layari website http://www.jpegmini.com untuk lihat demonstrasi dan info yang lain.

Dalam tutorial ringkas kali ni, akan menunjukkan cara menjimatkan space dalam memory card telefon.

  1. Download JPEGmini di sini dan install

  2. Copy gambar dari memory card telefon (kebiasaannya di dalam folder DCIM untuk pengguna Android) ke dalam PC — pastikan internet ditutup supaya gambar-gambar tidak synchronized dengan mana-mana cloud service

  3. Open JPEGmini dan pilih gambar-gambar yang telah copy ke dalam PC tadi — biarkan proses pengecilan selesai

  4. Copy semula gambar-gambar yang telah dikecilkan ke dalam memory card telefon


Nota:

  • Untuk memastikan memory card atau disk space sentiasa mempunyai ruang ekstra, jadikan proses ini sebagai rutin

  • Terdapat banyak compression tool yang lain, antaranya Caesium dan Fileminimizer

  • Untuk kecilkan gambar di dalam PC, hanya perlu browse folder gambar

  • Sebagai langkah berhati-hati, sila backup gambar-gambar atau buat salinan dahulu


Flickr Album 72157657307420334

Kecilkan saiz gambar dengan JPEGmini

Terlalu banyak gambar dalam PC atau phone sehingga kehabisan disk space atau memory card? Jom kecilkan saiz gambar-gambar dengan JPEGmini!

Secara ringkasnya, JPEGmini adalah satu tool atau software yang mampu mengecilkan saiz gambar-gambar yang kita mahu tanpa menjejaskan kualiti gambar. Boleh layari website http://www.jpegmini.com untuk lihat demonstrasi dan info yang lain.

Dalam tutorial ringkas kali ni, akan menunjukkan cara menjimatkan space dalam memory card telefon.
  1. Download JPEGmini di sini dan install
  2. Copy gambar dari memory card telefon (kebiasaannya di dalam folder DCIM untuk pengguna Android) ke dalam PC — pastikan internet ditutup supaya gambar-gambar tidak synchronized dengan mana-mana cloud service
  3. Open JPEGmini dan pilih gambar-gambar yang telah copy ke dalam PC tadi — biarkan proses pengecilan selesai
  4. Copy semula gambar-gambar yang telah dikecilkan ke dalam memory card telefon

Nota:
  • Untuk memastikan memory card atau disk space sentiasa mempunyai ruang ekstra, jadikan proses ini sebagai rutin
  • Terdapat banyak compression tool yang lain, antaranya Caesium dan Fileminimizer
  • Untuk kecilkan gambar di dalam PC, hanya perlu browse folder gambar
  • Sebagai langkah berhati-hati, sila backup gambar-gambar atau buat salinan dahulu

Thursday, October 1, 2015

Fotografi - Apa itu Shutter Speed, ISO dan Aperture

3 perkara yang sangat penting dan berkait rapat dalam fotografi, digelar "The Three Kings of Photography" atau lebih dikenali sebagai "Exposure Triangle". Ianya perlu difahami sebelum melibatkan diri dalam bidang fotografi.

Contoh Exposure Triangle (dari DPreview.com):

Jadi, apa itu Shutter Speed? ISO? Aperture? Secara ringkasnya (yang aku faham):

Shutter Speed


Kiraan atau kelajuan bukaan bilah atau tetingkap pada sensor kamera. Bergantung pada kamera, kelajuan biasanya bermula selama 30 saat hingga selaju 1/4000 saat.

Semakin lama bilah atau tetingkap tadi dibuka, semakin lama sensor terdedah pada cahaya — Akan menghasilkan gambar yang tidak tajam (blur), lembut, terang untuk satu-satu situasi.

Sesuai untuk:

  • gambar air yang mengalir seperti air terjun atau ombak laut (boleh gunakan filter atau pengecilan aperture untuk bukaan lebih lama)

  • gambar di dalam situasi kurang cahaya

  • gambar light trail

  • gambar awan bergerak (boleh gunakan filter atau pengecilan aperture untuk bukaan lebih lama)

  • gambar star trail (atau milky way)

  • dsb


Semakin laju bukaan maka semakin kurang pendedahan — Akan menghasilkan gambar yang tajam (sharp), gelap untuk satu-satu situasi.

Sesuai untuk:

  • gambar sukan

  • potret

  • produk

  • outdoor (situasi banyak cahaya)

  • dsb


Note:
Bagaimana kiraannya? Katakan shutter speed adalah 1/100, kelajuannya adalah bersamaan 0.01 saat. 1/200 bersamaan 0.005 saat. 30″ bersamaan 30 saat, begitulah seterusnya.

ISO


I (International) S (Standards) O (Organisation), ini yang diterjemahkan dari laman-laman web lain dan kelihatan tidak masuk akal langsung.

Sensitiviti sensor terhadap satu-satu situasi cahaya yang dikawal oleh software di dalam kamera. Semakin tinggi ISO, semakin terang, sedikit tajam dan kotor (noise atau berbintik-bintik, kurang kualiti).
Semakin kurang ISO, semakin gelap, bersih dan kurang tajam.

Kesesuaian ISO tinggi

  • ingin mendapatkan gambar terang dan sedikit tajam (medium high shutter speed) pada situasi kurang cahaya (malam atau indoor)

  • ingin mendapatkan gambar terang, large DOF (aperture) dan tajam (high shutter speed) pada situasi banyak cahaya (gambar sukan atau objek bergerak)

  • dsb


Kesesuaian ISO rendah

  • gambar pemandangan

  • gambar air terjun atau ombak

  • makro

  • dsb


Note:
Semakin tinggi ISO semakin kotor (noise) tetapi berguna untuk situasi tertentu

Aperture


Adalah bilah di lensa kamera yang mengawal kemasukan cahaya untuk didedahkan kepada sensor kamera. Jumlah bilah dan bukaan bergantung pada jenis lensa. Kebiasaanya, bukaan bilah (lens diaphragm) bermula dari nombor f/1.8 sehingga f/22 dan panggilannya pula adalah terbalik di mana nombor aperture yang rendah dipanggil besar (large aperture) begitu juga sebaliknya.

Aperture besar (cth: f/1.8 f/2.0 f/2.8)

  • lensa akan mendedahkan sensor kepada lebih banyak cahaya

  • shallow depth of field (DOF atau bokeh) yang lebih lembut

  • sesuai untuk potret dan situasi kurang cahaya


Aperture kecil (cth: f/8 f/11 f/16 f/22)

  • lensa akan mendedahkan sensor kepada cahaya yang kurang

  • large depth of field (tajam dan lebih meluas)

  • sesuai untuk gambar pemandangan dan situasi banyak cahaya


Contoh dan situasi


  • Gambar air terjun, water flow yang lembut, detail batu-batu yang tajam (tidak kotor) dan pada tahap terang yang biasa — Shutter speed 10″, ISO 100, Aperture f/16

  • Gambar kereta bergerak, tidak kabur (blur), terang — Shutter speed 1/500, ISO 1600, Aperture f/8

  • Gambar potret, background blur (bokeh), terang — Shutter speed 1/2000, ISO 400, Aperture f/1.8

Sunday, September 20, 2015

Download all media from Wordpress blog

A simple tutorial how to download all media from Wordpress blog. The reason I use this method is because, I wanted to transfer all the media specifically from XXX.files.wordpress.com domain into my other web host. And due to limitation of free account users, I couldn't access the media files by using any third party file manager such as FTP.

What we need:


Steps:


1) Login to your Wordpress.com account and export "All content" (My Sites > WP Admin > Tools > Export) — Save the exported file to a location where you can find it, easily

2) Rename the saved XML file (usually <your_name>.wordpress.<date>.xml) to HTML extension (e.g: <your_name>.wordpress.<date>.html) — If there is a rename warning prompted, just click Yes

3) Open the renamed HTML file with Mozilla Firefox (Don't panic with the content :-)), right click inside the opened file and choose DownThemAll! from menu

4) At DownThemAll! - Make Your Selection screen, do the following:


  • Click on Links tab

  • Save Files in: Locate your desired directory to save

  • Renaming Mask: *subdirs**name*.*ext*

  • Fast Filtering: https://<your_subdomain_name>.files.wordpress.com

  • Click Start!

  • Sit back and relax :-)


Post content without featured image header

Baru tambah template baru, "post content without featured image header" di mana semua post yang ada featured image takkan mempunyai header bila post dibaca.

Tujuan utama, supaya senang untuk export posts dari sini ke blog http://darwisy.wordpress.com

Seperti sedia maklum, plugin tidak boleh ditambah bagi pengguna free account di wordpress.com. Memandangkan kebanyakan featured image dalam blog ini menggunakan image dari host luar (Nelio External Featured Image), maka ini adalah langkah yang boleh dikatakan praktikal untuk display semua featured image di dalam post content.

Selain dari itu, ia juga dapat mengelakkan gambar berulang (repeating image) sekiranya masih mahu display gambar di header dan dalam content.

Tambahan, juga amat berguna sekiranya ingin menukar kepada theme yang tidak support featured image. Atau, export ke blog yang tidak support featured image. Logik: semua featured image akan berada dalam post content dan bukan lagi header.

Steps:


  1. Install plugin — Custom Post Template (not maintained but still working)

  2. Create new template, follow the simple instructions from plugin author - in my case, <?php ct_tracks_featured_image(); ?> has been removed

  3. The most hard task, edit all posts which containing featured image, MANUALLY! - look for featured image URL and insert somewhere into content


p/s: content di dalam post ini sangat membingungkan hahaha

Saturday, August 22, 2015

Wordpress landing page with Supersized

Before I start,

Click here if you wish to see it in action!

Click here to get some introduction of Supersized

Now let's start!

First thing first, download this amazing image slider here. In this tutorial, I'll be using the version for Flickr.

Second thing, of course you've got Wordpress installed :-)

Part 1, preparing the files


  • Extract the desired version (example: flickr) into your Wordpress root folder (or in a another folder, but you need to change some path inside the coding)

  • Inside the folder, there is a main html file (example: flickr.html). Rename the file extension to .php (example: flickr.php)

  • Insert this at the top line of the file, then save it: <?php /** Template Name: Supersized **/ ?>

  • Copy the saved file into wp-content/themes/your-current-theme/templates


Part 2, little modification


Part 3, create a landing page, blog page and Reading Settings


  • Create a new page with title Landing Page, choose the saved file earlier (Supersized) as template (How to choose template) and leave the content empty

  • Create another page with title Blog, no template and content require for this

  • Go to WP-Admin > Settings > Reading > Front page displays and select the A static page (select below)
    -- Front page: Landing Page
    -- Posts page: Blog

  • Save the settings


Well, that's all for basic. Of course I did a lot of modifications in the main html file. You might want to play around with it, enjoy! :-)

Wednesday, August 12, 2015

How to delete Account Picture in Windows 10

Self note


Scenario: Not able to delete or set to default local Account Picture in Windows 10 (Settings > Accounts > Your account > Your Picture). Removed from https://profile.live.com but seems does not affect the local setting.

Solutions:

Go to "C:\Users\<USERNAME>\AppData\Roaming\Microsoft\Windows\AccountPictures" and delete the content(s) or;

Go to C:\Users\<USERNAME>\AppData\Local\Packages\windows.immersivecontrolpanel_***\TempState then;

Back to "Your account" setting, click on "Browse" and type in "C:\ProgramData\Microsoft\User Account Pictures\user.png" following with "Choose picture" button or enter.

*** not sure if this would be same or not, mine is windows.immersivecontrolpanel_cw5n1h2txyewy

2015-08-12_09_37_49

2015-08-12_09_36_51

2015-08-12_09_50_30


Tuesday, August 11, 2015

WordPress Images ERROR 404

Self note


Scenario: Getting reports saying most of Wordpress images ERROR 404. In fact, they are exists in /wp-content/uploads/* folders.

Solutions:

Failed — Disabled certain plugins, disabled all plugins, change uploads folder/files permission, modify .htaccess file, delete .htaccess file, change Permalinks settings to default, etc

Success — Switched the PHP Date Format in General Settings from Custom (D, M jS, Y) to Default F j, Y (e.g: August 10, 2015)

Friday, August 7, 2015

Linking (faking) a folder into OneDrive

In my case, I have a folder ("2015" in Pictures) which in a different partition. Installed OneDrive app, and I don't want to "move" the "2015" folder into "OneDrive\Pictures" as it will increase my C:\ drive usage.

So, here is how I did, basically it's like "faking" a folder in "OneDrive\Pictures"
Syntax: mklink [[/d] | [/h] | [/j]] <Link> <Target>

Example:

Link — "C:\Users\Hilman\OneDrive\Pictures\2015-link"

Target — "D:\Pictures\2015"


  1. Run a CMD as Administrator

  2. Type "mklink /j "C:\Users\Hilman\OneDrive\Pictures\2015-link" "D:\Pictures\2015"

  3. A folder (fake) with name "2015-link" will be created in "C:\Users\Hilman\OneDrive\Pictures", thus will be sync into OneDrive online — You may notice the folder will look like a shortcut icon


What happen then? Well, whenever I saved a photo into "2015-link" folder it will actually save it into "D:\Pictures\2015"... and vise versa. Of course, it will not increase my C:\ drive usage.

For more info about MKLINK parameters, click this.

Note(s):

  1. Do not create the folder in Link, instead create it in CMD prompt. Otherwise, an error will appears saying "Cannot create a file when that file already exists."

Monday, July 27, 2015

Tukar "bunyi sentuh" telefon Android

Mesti ada yang dah bosan dengar bunyi sentuh (touch sound) sama setiap kali menyentuh screen telefon kan? Lagi-lagi telefon samsung, rasa dah macam menyelam dalam air bunyi blup-blup-blup hehehe.

Ok, ni ada tutorial mudah untuk menukar bunyi sentuh telefon Android anda. Akan tetapi, hanya boleh digunapakai oleh telefon yang sudah "root". Kalau belum, tak pasti samada boleh atau tidak. Ada yang kata boleh dan ada yang kata tidak. Tutorial ni juga sesuai bagi yang baru bermain-main dengan root :-)

Anyway kalau nak root telefon, cuba cari di Google bagaimana caranya dengan keyword "how to root **model telefon**". Contoh: "how to root galaxy s4"

Sedikit info berkenaan telefon yang digunakan dalam tutorial ni:
Brand: Samsung
Model: Galaxy S4 Active (GT-I9295)
Root: YES

Kalau dah root, ikut langkah-langkah ni:

  1. Cari dan download bunyi-bunyi yang hendak digunakan di internet. Atau boleh download bunyi on_click ni. Simpan ke dalam SD Card telefon

  2. Install apps "file manager" yang boleh gunakan access root, contohnya ES File Explorer File Manager

  3. Buka apps file manager tadi, dan pergi ke file on_click.zip tadi. Cari bunyi yang sesuai dengan play satu persatu, namakan file yang anda minat kepada TW_touch.ogg (untuk telefon Samsung Galaxy S4 Active). **bergantung kepada jenama atau model yang lain, nama file untuk bunyi sentuh mungkin berbeza**

  4. Copy file TW_touch.ogg tadi dan overwrite/paste ke folder: /system/media/audio/ui/ **buat salinan backup jika boleh**

  5. Restart telefon anda dan selesai :-)


Bila telefon dah restart, sentuh di screen telefon dan sepatutnya bunyi sentuh akan bertukar. Selamat mencuba :-)

Tuesday, June 16, 2015

DIY - Negative film to digital image

Tak berapa pasti term untuk projek kali ni, ada yang kata "negative to positive", "film to digital", "negative film to digital image" dan macam-macam lagi. Apa-apa pon, projek ni berkenaan convert negative film kepada bentuk image digital... sendiri pikir la term yang sesuai hehehe.

Straight to the point, barang-barang yang digunakan dalam projek ni:

  • Kamera - guna "close up" lens jika boleh, 35mm - 50mm should be ok... tapi jangan ultra wide la hehehe

  • Kotak - saiz tidak terlalu panjang supaya boleh close up dan tidak terlalu pendek untuk elakkan "focus problem"

  • Gunting / pisau

  • Kertas A4 - optional je, untuk diffuse cahaya

  • Negative film


Gunakan gunting atau pisau untuk buat lubang di kotak, lebih kurang macam ni:


Kadang-kadang negative film akan melengkung, gunakan akal fikiran untuk meratakan lengkungan tu... lebih kurang sepit macam ni:


Halakan depan kotak yang ada negative tadi ke arah cahaya, masukkan kamera ke dalam kotak, focus dan snap! Gunakan kertas A4 tadi kalau cahaya tidak sekata (diffuse)


Next step, kita edit dalam Photoshop... ada banyak cara yang boleh digunakan, cuba Google untuk cara yang lain hehehe...

https://www.youtube.com/watch?v=CF_71dIYxAY


Satu lagi hasil menggunakan teknik yang sama, gambar kenangan di kampung ketika kenduri cukur Darwisy. Saje biarkan frame nampak macam tu, vintage sikit hehehe :-)


Full album: https://www.flickr.com/photos/hilmanali/albums/72157659237139649

Selamat mencuba dan semoga enjoy :-)

Monday, June 8, 2015

Jadikan Laptop sebagai Wifi Hotspot

Sekadar nota kaki untuk sendiri dan kepada sesiapa yang berminat nak mencuba.

Cara ni sama je dengan cara-cara yang boleh didapati di Google, in fact ada banyak tools/apps yang boleh digunakan untuk tujuan yang sama. Mungkin berbeza sikit tutorial ni sebab menggunakan bahasa pasar. Anyway, sangat bagus sekiranya wifi yang sedia ada berada jauh (signal yang lemah). Seeloknya, laptop tu menggunakan LAN cable untuk network connection dan semestinya LAN mempunya akses internet.

Tanpa membuang masa, kalau nak create Wifi Hotspot guna laptop (secara manual) jom kita mulakan...

1) Taip (kalau malas taip, copy paste je) ke dalam Notepad. Optionally, boleh tambah command "pause" di line terakhir (untuk troubleshoot, in case kalau ada error). "key" tu tukar ikut citarasa, sebagai password.
netsh wlan stop hostednetwork
netsh wlan set hostednetwork mode=allow ssid=WifiAku key=abcd1234
netsh wlan start hostednetwork
pause

2) Save notepad tadi kepada "Hotspot.bat" ke Desktop. Masa nak save tu pilih "Save as type" kepada "All Files (*.*)"

3) Click kanan pada Hotspot.bat tadi (di Desktop) dan pilih "Run as administrator". Kalau ada prompt security warning, click pada "Yes"

4) Pergi ke Control Panel dan click pada "Network and Sharing Center".  Click pada "Connections: Ethernet", pilih "Properties" > tab "Sharing" > pilih "Allow other network users..." > pilih nama network yang baru untuk SSID WifiAku tadi (contoh: Local Area Connection***)

5) Click OK

Dah siap semua steps di atas, gunakan phone pulak untuk cari Wifi Hotspot tadi. Gunakan "key" sebagai password. Anda akan mendapat signal yang kuat sebab wifi hotspot tu berada di depan mata anda :-)

https://www.youtube.com/watch?v=0aWSaMsQs2g

P/S:

- Encryption yang digunakan dalam tutorial ini adalah "WEP". Untuk advanced features, sila gunakan tools/apps yang sesuai atau cari tutorial yang lain di Google

- OS yang digunakan dalam tutorial ni adalah Windows 8.1, boleh diguna pakai untuk OS lain seperti Windows 7. Selain tu, tak pasti hehehe

Friday, May 22, 2015

Tweaked header

Originally, this theme (Tracks) doesn't provide a full-width-image-header feature.

Found someone raised a such request at the theme's support page. So I thought it would be great to implement on this blog. Anyway, tweaked header a little bit... hope my kids will love it (and you too).

CSS used:

.title-info .logo {
max-width: 100%;
max-height: 100%;
}
#title-info {
position: relative;
z-index: 0;
}
.logo {
width: 100%;
}
.site-header .container {
max-width: none;
}
#menu-primary {
max-width: 1280px;
margin: 0 auto;
}
#title-info {
float: none;
}
@media all and (min-width: 50em) {
#title-info {
margin-top: -1.5em;
}
}
.site-title, .h2 {
text-align: right;
}
.site-header .site-title {
opacity: 1;
}

Friday, May 8, 2015

Microlife AG 9435 Thermometer - Change from Fahrenheit to Celsius (vice versa)

Ideally for my own reference, but might also useful for readers.

Product name: Microlife AG 9435 Thermometer

Notes:

Steps (what I did):

  • Turn OFF

  • Press Start button and hold until it flashes

  • Press Start button to toggle the temperature mode

  • Restart


2015-05-07_23_42_532015-05-07_23_43_14

2015-05-07_23_43_28

2015-05-07_23_55_41

2015-05-07_23_56_28